
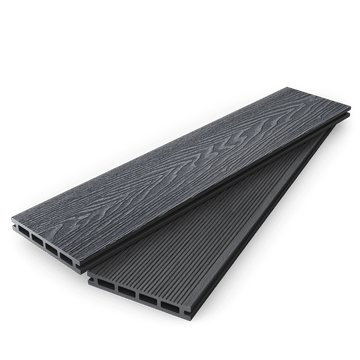
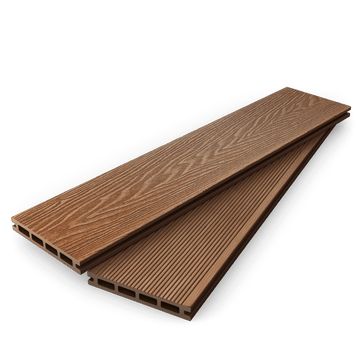
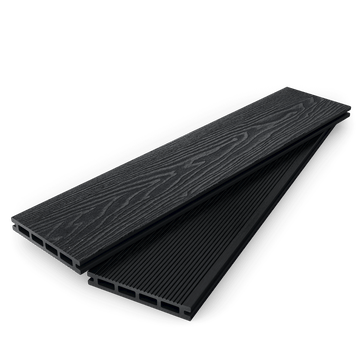
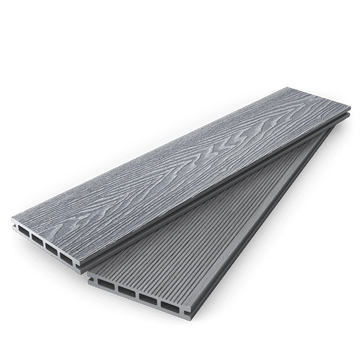


Composite decking boards create the visible surface, but they are only one part of a complete project. The support beneath the boards, the clips between them and the pieces around exposed edges all need to be considered before an order is placed.
That is where decking accessories come in. Joists support the board layout. Clips and fixings connect the boards to the approved substructure. L trims can cover suitable exposed edges, while step-edge pieces can give steps and selected borders a more deliberate finish. Each part has a different job, and one accessory should not be treated as an automatic substitute for another.
This guide explains the main accessories available alongside the Scotts Exteriors composite decking range. It is intended to help with product selection and order planning, not to replace the installation instructions for a chosen board system. Exact spacing, support, fixing and edge details must always be confirmed for the specific product and site.
Why decking accessories should be planned with the boards
It is easy to begin with the colour and length of the deck boards, then leave every other decision until installation day. That often creates avoidable questions. Which edges will be visible? Is there a step? Where will cut board ends appear? Does the proposed substructure suit the boards? Are the clips and fixings compatible with the exact profile?
A better approach is to draw the full deck and identify the job of every part. Mark the board direction, perimeter, house wall, garden-facing edges, steps, changes of level, access panels and any places where one material meets another. The drawing does not need to look professional. It simply needs to make the whole project visible before quantities are finalised.
Planning the accessories at the same time also helps the finish look coordinated. A colour-matched edge can feel like part of the design, while a last-minute piece selected only because it is available may stand out. Browse the current composite decking accessories beside the composite decking boards rather than treating them as separate shopping trips.
Composite joists and the support beneath the deck
Joists form part of the supporting structure beneath the visible boards. The Scotts range includes a black composite joist, but its suitability depends on the complete project design. A ground-level area, a raised deck and a structure over an existing surface can require different professional decisions about foundations, support, drainage, ventilation and access.
Do not choose a joist only because its material or colour matches the boards. Confirm the permitted use, dimensions, support requirements and fixing method for the exact product. The distance between support points and between joists must come from the applicable technical information, not a general rule copied from another decking system.
The planned board direction matters because it relates to the supporting layout. Board ends and joints also need suitable support. Steps, picture-frame borders, access points and changes of direction may require additional planning beneath the surface. A layout that looks simple from above can contain several distinct support conditions below.
Before ordering joists, ask:
- what surface or foundation will support the deck;
- whether the deck is ground level or raised;
- which way the boards will run;
- where full boards, cut boards and joints will finish;
- how edges and steps will be supported;
- how water will leave the area; and
- what inspection or access may be needed later.
If any part is structural, raised, unusually shaped or close to a building opening, use a competent designer or installer and obtain the current product instructions before committing to materials.
Clips and fixings: small parts with a system-specific role
Clips and fixings sit out of sight for much of the finished deck, but they are not generic extras. Their shape, material and installation method need to suit the board profile and approved support arrangement.
The current Scotts decking offer includes clips and fixings with board orders. That is useful when building the initial order, but you should still confirm exactly what is included for the selected product and whether any additional starter, finishing or project-specific components are required. An unusually shaped deck, multiple isolated areas or a repair project may not follow the same component pattern as a simple rectangle.
Avoid mixing unconfirmed clips, screws and board profiles. A part that looks similar may hold the board differently or create a gap that does not match the system. Do not replace a specified fixing with a convenient general-purpose screw without approval from the relevant product guidance.
Keep clips and fixings organised and protected before installation. Count the packs received, compare them with the order and store them with the matching boards. If an installer is doing the work, show them the complete component list before the installation date so any question can be resolved early.
L trims and suitable exposed edges
An L trim is an angled finishing profile used around suitable exposed areas. It can create a clean visual line where the side of the deck or a cut edge would otherwise remain visible. Scotts lists L trims in five colour families that coordinate with the decking palette: Dark Grey, Charcoal, Light Grey, Teak and Coffee.
The word “trim” can make the part sound purely decorative, but its position should still be planned. Identify the substrate or edge it will relate to, the corners it must turn, the joins between lengths and the way board movement is accommodated. The correct fixing method must come from the current instructions for the selected system.
Use the drawing to separate the perimeter into sections. A deck against a wall may have one treatment at the building side and another along the garden-facing side. A border next to paving may not need the same visible profile as an elevated edge. Doors, posts and planters can divide a long run into smaller pieces.
Do not assume an L trim is intended to act as a step nosing or structural support. If people will regularly place weight on an edge, or if the detail forms part of a step, confirm the appropriate product and support arrangement rather than selecting by appearance alone.
Step-edge pieces for steps and defined borders
Step-edge products are intended to create a more deliberate front edge on a compatible step or selected deck boundary. The Scotts range includes 3.6m step-edge pieces in five colours. That allows the visible edge to coordinate with Dark Grey, Charcoal, Light Grey, Teak or Coffee decking where the chosen combination and detail are suitable.
Steps need more than a finishing piece. Rise, going, support, access, adjacent doors, handrails and local requirements may all affect the design. The edge product is one component within that wider arrangement. Do not use a standard board or trim as a substitute simply because the colours are close.
Draw each step separately. Record its width, the number of exposed ends and whether the step meets a wall, planter, path or another deck level. Decide whether the step edge will match the main boards or form a deliberate contrast. Then ask the supplier or installer to confirm the correct support and fixing detail for that chosen piece.
A step edge may also influence the board layout immediately behind it. It is better to resolve the first and last board positions on paper than to discover an awkward narrow cut at the front of a completed structure.
Matching accessories to the five colour families
Scotts composite decking is organised around Dark Grey, Charcoal, Light Grey, Teak and Coffee. Not every board length is offered in every colour, so start with the actual product rather than a colour name in isolation.
Dark Grey is available across the current 2.8m, 3.6m and 4m board choices. The 3.6m range also includes Charcoal, Light Grey, Teak and Coffee. The accessory collection gives you colour-related L trims and step edges to consider beside those boards.
Colour matching should be checked in real light. A board face, a vertical trim and a step edge can catch light differently even when they belong to the same named family. Texture and orientation also change the way a shade reads. View samples together, both flat and upright, and compare them beside the house, paving, fencing and planting.
An exact match is not the only design route. A deliberate contrast can define a border or step, but it should be intentional and repeated consistently. If you choose a contrasting edge, make sure every affected length and corner has been included in the quantity plan.
For a deeper colour decision process, compare the live options in the decking collection and request the information you need before ordering.
How to plan accessory quantities
Board area alone is not enough to calculate every accessory. Joists relate to the approved support layout. Clips and fixings relate to the board system and arrangement. Trims and step edges relate to measured linear runs, corners, joins and cutting plans.
Start with three simple drawings:
- a plan view showing the deck from above;
- an edge view showing every visible side and change of level; and
- a step or detail sketch for any non-standard area.
Add dimensions to each drawing. Label the board length and direction. Mark all full and cut edges. Note where a run can use a continuous accessory length and where a joint will be required. Keep openings and obstacles visible rather than subtracting them from one large total too early.
The Scotts decking calculator can help you form an initial board and project estimate. Treat the result as a planning aid. Check the final board, joist, trim, step-edge, clip and fixing quantities against the product guidance and the real drawing before purchase.
Allowing for cuts does not mean adding the same percentage to every component without thought. A short perimeter with several corners can use material differently from one straight run of the same total length. Board offcuts may not be useful as step edges or trims. Plan each product in the units and lengths in which it is sold.
Corners, joins and transitions deserve their own check
Corners are where otherwise neat plans often become unclear. Two trims may meet. A trim may stop at a wall. A deck may transition into paving, lawn, a planted border or a step. Each junction needs a visible and practical decision.
For every corner, ask what will be seen from above, from the side and while approaching the deck. Check whether the system provides a preferred corner method. Do not assume a mitred appearance is automatically suitable for the material, exposure or fixing arrangement.
Long accessory runs may also need more than one piece. Mark each join and try to place it deliberately rather than wherever the material happens to end. If several parallel lines meet, such as boards, a step edge and a wall, agree which line controls the overall layout.
Transitions to other materials should account for their finished level and the installation detail. The visual goal may be a clean meeting line, but the supporting and drainage requirements still need to be resolved by the installer or designer.
A complete pre-order accessories checklist
Before confirming the order, work through the whole system rather than reviewing the boards alone.
- Confirm the selected board length, colour and quantity.
- Obtain the current product and installation information.
- Confirm the planned board direction and supporting arrangement.
- Identify every board end, joint and change of direction.
- Mark all visible perimeter edges.
- Draw every step and change of level.
- Decide where L trims are suitable.
- Decide where a step-edge product is required.
- Confirm the colour treatment for trims and edges.
- Check the exact clips and fixings included with the order.
- Ask whether any starter, finishing or project-specific components are additional.
- Plan joists and supports from the approved layout, not from deck area alone.
- Count accessory lengths by measured run and cutting plan.
- Check corners, joins and transitions.
- Confirm storage, access and who will inspect the delivery.
Keep this checklist with the final drawing and order confirmation. It gives the installer a clear starting point and makes it easier to identify a missing decision before work begins.
Extending or repairing an existing deck
An extension or repair needs the same level of planning as a new deck, with the added challenge of identifying what is already there. Do not select a replacement clip, board, trim or joist from appearance alone.
Record the existing board profile, dimensions, colour, support arrangement and fixing method. Locate the original order or product information if possible. A current product with a similar name may not be identical to an earlier version.
Check whether the existing structure is suitable to retain. Movement, damage or a failed edge can have a cause below the visible surface. Ask a competent person to inspect any concern before new materials conceal it.
Where old and new surfaces meet, decide how the change will look and how each side will be supported. Colour may have changed through weathering and normal use, so a new same-name accessory can still appear different. View a sample beside the real deck.
Build the repair list from verified compatible components. If compatibility cannot be confirmed, stop rather than forcing an available accessory into an unknown system.
Common accessory-planning mistakes
The first common mistake is ordering boards for the visible area but no clear edge treatment. The second is treating all dark colours as interchangeable. The third is assuming any clip, screw or support will work with any composite board.
Other avoidable problems include measuring only the overall perimeter, forgetting that walls and steps divide it into different details, counting a step edge as a decorative trim, and leaving corners until materials are already cut.
It is also risky to copy spacing or fixing information from another brand’s article. Composite systems can differ in profile, support and movement requirements. Use general guides to create questions, then use the exact product information to answer them.
Finally, do not hide uncertainty in the order. If the design is not settled, ask for help with the drawing and component list. A short planning conversation is more useful than buying several “just in case” items that may not suit the final detail.
Build the order around one coordinated plan
The best accessory list is not the longest one. It is the list that matches the chosen boards, actual layout and agreed installation detail.
Begin with the current composite decking range, then review the matching joists, trims and step edges. Use a measured plan to show where every product will go. Confirm system-specific support, spacing and fixing requirements before materials are ordered or cut.
If you are still comparing board lengths, continue with the 2.8m, 3.6m and 4m board-length guide. If the design is ready but the installation questions are not, use the composite decking installation planning checklist to prepare the next conversation with Scotts or your installer.


