



Composite decking and cladding can help a garden project feel connected from ground to wall. The aim is not necessarily to make both surfaces identical. A successful scheme can use a shared colour family, a deliberate contrast or one quiet material that allows the other to lead.
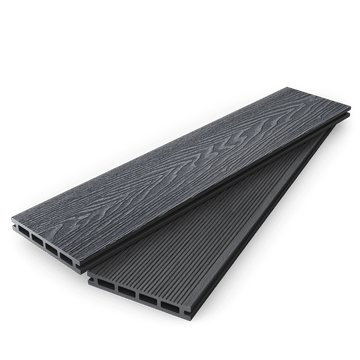
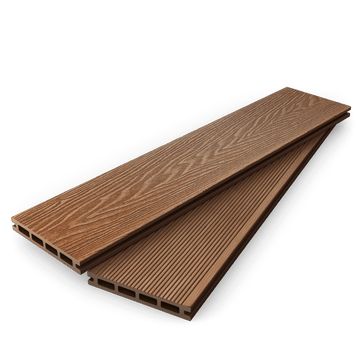
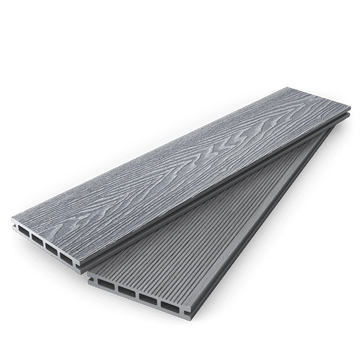
The Scotts Exteriors range gives you several points of connection. Composite decking is available in Dark Grey, Charcoal, Light Grey, Teak and Coffee across the current board choices. The 3.6m composite cladding range includes Dark Grey, Charcoal, Light Grey and Teak. That overlap supports coordinated combinations without forcing every project into one shade.
This guide focuses on design and order planning. Cladding suitability, wall build-up, support, ventilation, drainage, fire performance and regulatory requirements must be confirmed for the exact product and building. The generated image is visual inspiration, not a construction detail or an exact product match.
Give decking and cladding separate jobs
Begin by defining what each material is doing. Decking forms the outdoor surface and route. Cladding forms a vertical exterior finish on a suitable wall or structure. They are viewed from different angles, receive light differently and meet different technical requirements.
Write a one-line role for each. For example: “The deck creates a calm seating terrace” and “The cladding makes the garden room the main dark feature.” That immediately suggests the deck may be quieter than the wall.
Another scheme might use warm Teak decking as the main visual element while Dark Grey cladding connects with window frames. The materials relate through the overall palette rather than through an exact colour match.
Avoid choosing both products from separate photographs. Place them on one elevation drawing and one plan of the garden. The drawings show proportion, while real samples show colour and texture.
Understand the current overlapping colours
The current Scotts composite decking range includes five colour families:
- Dark Grey;
- Charcoal;
- Light Grey;
- Teak; and
- Coffee.
The composite cladding range currently includes 3.6m boards in:
- Dark Grey;
- Charcoal;
- Light Grey; and
- Teak.
Those four shared names make a same-family scheme possible. Coffee decking can still be coordinated with cladding, but it becomes a contrast or complementary pairing rather than a shared named colour.
Check the live catalogue when ordering. A colour name on an old page or saved image does not confirm current product availability. Also remember that a horizontal deck face and vertical cladding face can make the same named colour look different.
Decide whether to match, coordinate or contrast
There are three useful design routes.
An intended match uses the same named colour family for decking and cladding. This can make a compact garden room and terrace feel like one designed composition. It works best when samples are checked together and the large combined area does not overwhelm the space.
A coordinated palette uses related but different tones, such as Dark Grey cladding with Light Grey decking. The cladding remains defined while the ground plane feels lighter. This route often provides clearer separation between wall and floor.
A deliberate contrast pairs warm and cool families, such as Teak decking with Charcoal or Dark Grey cladding. Repeating the warm or dark colour elsewhere through furniture, frames or planters can make the contrast feel intentional.
None is automatically more premium. The right route depends on the property, garden size, fixed materials and the amount of each surface visible.
Use the building as the starting palette
List the colours that cannot easily change: brick, render, roof, doors, windows, fences, paving and major structures. Then identify their undertones rather than relying only on names like grey or brown.
A cool grey frame may sit naturally with Charcoal or Light Grey. Warm brick may connect with Teak or Coffee. Dark Grey can provide a neutral bridge between warm masonry and black details, but samples should confirm the relationship.
Choose one dominant neutral, one supporting tone and one restrained accent. Decking and cladding can fill the first two roles. Planting, furniture or small details can carry the accent.
Do not add a new composite colour simply because it is attractive in isolation. Every added family competes with the fixed palette. A controlled scheme usually gives the texture and board direction more room to work.
Photograph samples beside the actual wall and frames, but make the final decision in person. Phone processing and screen settings can change the result.
Check the proportion of horizontal and vertical surfaces
Cladding that covers a full garden-room elevation can occupy a large part of the view. Decking may fill much of the foreground. If both use the darkest tone, the combined effect can be stronger than either sample suggests.
Shade the proposed areas on an elevation. Step back and compare the proportion of dark, mid and light materials. Include glass, doors, roof edges and planting rather than evaluating a blank rectangle.
In a small garden, a Light Grey deck may provide visual separation from a Charcoal-clad room. In a larger planted setting, a darker deck and wall may be balanced by lawn, pale paths and foliage. These are design observations, not fixed rules.
Consider which surface is seen first from inside the house. The deck may dominate the lower half of the view throughout the year, while cladding frames the destination. Give the foreground enough visual calm.
Let board direction create connection
Decking boards create horizontal lines across the ground, even when they run away from the house. Cladding can be installed in an approved horizontal or vertical orientation where the selected system permits it. The relationship between those lines affects the whole composition.
Vertical cladding can contrast with long deck lines and emphasise the height of a garden room. Horizontal cladding can echo the deck rhythm and make the structure feel wider. The choice must also suit the product instructions, supporting arrangement, openings and drainage design.
Draw arrows over the plan and elevations to show board directions. Look at the point where the deck approaches the clad wall. Decide whether lines align, meet at a clear right angle or stop at a deliberate border.
Do not rotate a product simply to achieve a visual effect without confirming that the orientation and complete wall build-up are permitted.
View real samples in the intended orientation
Place the decking sample flat and the cladding sample upright. This is important because the angle to daylight changes how the colour, grain and sheen appear.
Check them in the morning, around midday and later in the day. View the samples from inside the house and from the main garden seating position. If the structure is shaded while the deck receives sun, recreate those conditions as closely as possible.
Compare dry samples and, where the product guidance allows, their appearance after rain. Outdoor surfaces can look darker when wet. Make sure the chosen relationship still feels balanced.
Use more than one piece if natural or manufacturing variation is expected within the product. Ask how the supplier recommends reviewing and mixing boards during installation.
Keep the approved samples and order details until the project is complete. They provide a reference if product names or screens create confusion later.
Coordinate decking with doors, frames and roof details
Garden rooms often include dark aluminium-style frames, fascias, roof edges or lights. Those details can connect the deck and cladding without requiring the two composite surfaces to match.
For example, Dark Grey cladding may relate to black frames, while Teak decking introduces warmth. A dark planter or furniture frame repeats the wall colour at ground level. The scheme becomes connected through repetition.
If the cladding and frames are both dark, check that door openings remain visually clear and the wall does not become one undifferentiated block. A lighter reveal, handle or adjacent surface may help, but the final choice belongs to the building design.
Avoid assuming two manufacturers’ “anthracite”, “charcoal” or “dark grey” labels are the same. Put physical samples together. An almost-match can be more distracting than an intentional difference.
Plan the meeting between deck and clad wall
The visual junction is small, but the technical design behind it matters. The deck should not simply be pushed against the cladding until no gap is visible.
Draw a large-scale section showing the wall, cladding, support, deck boards, deck support, ground and drainage route. Mark door thresholds, vents and any required access. Ask the responsible designer or installer to confirm clearances, movement, ventilation, drainage and fixing details for both systems.
The cladding wall and deck may be installed by different trades. Make sure their drawings agree. Confirm who sets the finished deck height and who protects the lower wall detail.
Do not use a trim to conceal an unresolved junction. A neat cover can hide the view without solving trapped water, blocked ventilation or unsupported edges.
If the deck is independent from the structure, show that relationship clearly. If any connection is proposed, it needs project-specific approval.
Treat corners, openings and edges as design features
Cladding is interrupted by doors, windows, corners, roof lines, vents, sockets and lights. Decking is interrupted by steps, borders, posts, planters and changes of level. These details are where the palette becomes real.
Draw every elevation rather than choosing a colour from the main front view alone. A side wall may have several cut edges and a different amount of sun. A rear step may reveal the deck profile from the garden.
Confirm the compatible trims or profiles required for the cladding system. For decking, review the Scotts L trims and step edges where they suit the approved detail. Match or contrast colours intentionally.
Repeat the same approach at similar conditions. If one exposed deck edge is Dark Grey against Teak boards, consider whether another visible edge should follow the same rule.
Use planting and paving to bridge the palette
Planting can soften the line between a clad structure and deck. Evergreen foliage provides a consistent green counterpoint, while grasses and flowering plants add movement and seasonal colour.
Pale planters or paving can separate two dark composite surfaces. Dark containers can repeat Charcoal or Dark Grey against a Light Grey deck. Warm pots, brick or gravel can connect with Teak or Coffee.
Keep planters and soil away from details where they would block required drainage, ventilation or access. Check the product guidance and the load or support requirements for large containers rather than positioning them from a styling image alone.
Limit the number of hard materials. Decking, cladding, paving, fencing and furniture already create several textures. Repeating one colour in small amounts can be more effective than adding another major finish.
For a mixed hard-surface scheme, read the composite decking versus paving guide.
Consider four dependable palette directions
These combinations are starting points for sample testing, not promises that named colours will match every property.
Dark Grey with Dark Grey: A continuous contemporary route. Use differences in orientation, light and planting to prevent the wall and deck from feeling flat.
Charcoal cladding with Light Grey decking: A strong vertical feature above a lighter ground plane. This can separate the garden room from the terrace while keeping both within a cool palette.
Dark Grey cladding with Teak decking: A cool structural frame with a warmer outdoor surface. Repeat one warm and one dark note elsewhere to connect the scheme.
Light Grey cladding with Coffee decking: A lighter wall above a deeper brown base. Check the relationship beside brick, render and frames to ensure the undertones work together.
You can reverse several combinations, but the proportions will change the result. Always test the products in their actual orientations.
Build separate quantity plans for each system
Decking and cladding are both board products, but their quantities should not be combined into one area calculation. Each has its own orientation, stock length, openings, cuts, support and accessories.
For decking, draw every board row and use the available 2.8m, 3.6m or 4m length that fits the selected colour and cutting plan. Mark steps, borders, trims and joists separately.
For cladding, draw each elevation, subtract openings carefully and add corners, reveals, start and finish conditions and other compatible profiles according to the approved system. Do not assume every offcut from one wall can be used on another.
Keep two schedules under one project cover sheet. The cover sheet records the shared palette and design decisions. The separate schedules protect the technical differences.
Use the decking calculator for an initial decking estimate, then have both final schedules checked against the current product instructions and site drawings.
Coordinate ordering and on-site checks
Confirm product titles, colours, lengths, quantities and accessories on the order. Do not rely on a short note such as “all dark grey”. Distinguish decking boards, cladding boards, trims, step edges, joists, clips and fixings.
Plan delivery access and storage for the longest components. Keep decking and cladding separated and labelled. Store each product according to its own instructions.
Inspect materials before cutting. Compare the received colours with the approved samples and order confirmation. If several packs or batches are present, follow the current guidance for reviewing and distributing any variation.
Make sure both installers know the agreed palette and junction details. A technically correct substitution can still change the visual plan, so obtain approval before replacing a visible item.
Common coordination mistakes
The first mistake is choosing both materials from screen images without samples. The second is assuming a shared colour name guarantees an identical appearance. The third is evaluating small pieces without considering the total area of wall and deck.
Other problems include introducing too many grey and brown undertones, ignoring the fixed colour of frames and paving, leaving board direction undecided and treating the deck-to-wall junction as a last-minute trim detail.
It is also risky to let the design language override technical suitability. A desired vertical cladding pattern or flush-looking deck junction still has to follow the exact system guidance and project requirements.
Finally, do not place accessories at the end of the budget. Visible edges, corners, openings and steps are part of the completed composition and need to be drawn and priced with the main products.
Your decking and cladding checklist
Before confirming the scheme, check:
- the separate role of the deck and clad surface;
- the fixed colours of the property and garden;
- whether the palette matches, coordinates or contrasts;
- the current Scotts colour availability for both products;
- the proportion of each colour in the full view;
- board direction on the plan and every elevation;
- physical samples viewed flat and upright;
- appearance in the site’s real daylight;
- door, window, corner, roof and edge details;
- the designed junction between deck and clad wall;
- drainage, ventilation, support and movement requirements;
- separate quantity and accessory schedules;
- delivery, storage and inspection arrangements; and
- agreement between everyone responsible for design and installation.
Start by comparing the live composite decking and composite cladding collections side by side. Build the scheme from samples, drawings and verified product information, then use colour and board direction to connect the two surfaces without pretending they are the same system.


